How To Create Custom Mugs in 2026: A Step-by-Step Guide on Mug Printing Tools
A practical guide that explains how mug printing tools work and how to use them efficiently, even without prior design experience.
Introduction
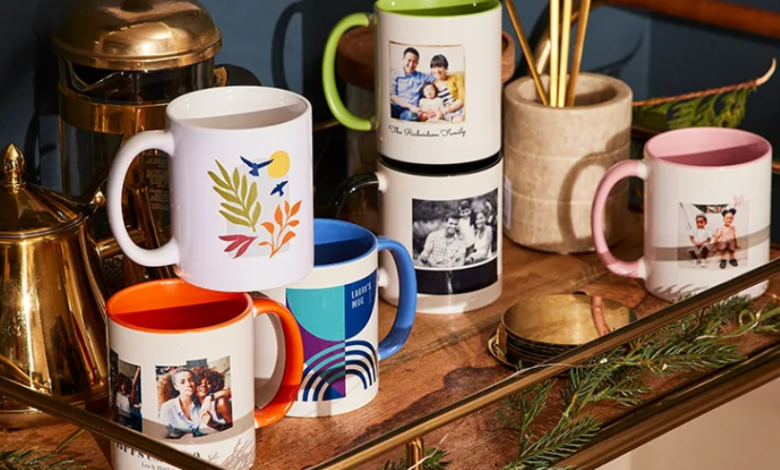
Custom mugs are widely used for team merchandise, promotional items, event giveaways, and personalized gifts. What once required graphic design software and print production knowledge can now be done through browser-based mug printing tools that simplify layout, sizing, and export.
This guide is designed for beginners, small business owners, educators, and anyone who wants to create a custom mug quickly without formal design training.
Mug printing tools typically include pre-sized templates, drag-and-drop interfaces, text styling controls, and preview features that simulate how a design wraps around a mug. Some also integrate with print-on-demand providers or allow high-resolution file export.
A practical starting point is the Adobe Express mug designer, which provides pre-sized layouts and guided editing specifically for printable mug designs.
Step-by-Step How-To Guide for Using Mug Printing Tools
Step 1: Choose Your Mug Type and Start with a Pre-Sized Template
Goal
Ensure your design fits the printable area correctly.
How to do it
- Decide on mug size (11 oz, 15 oz, travel mug).
- Select a mug-specific template inside your design tool.
- In the Adobe Express mug designer, choose a layout that matches your mug dimensions.
- Confirm bleed and safe margin areas.
- Check whether the design wraps fully or appears on one side.
What to watch for
- Designing on a generic canvas with incorrect proportions.
- Ignoring bleed margins.
- Using the wrong mug size template.
- Forgetting handle placement.
Tool notes
To verify final print specifications before production, a print-on-demand platform such as Printful (shipping and fulfillment provider) can provide downloadable mug templates and technical dimension guides.
Step 2: Define the Design Purpose Before Adding Elements
Goal
Clarify what the mug should communicate.
How to do it
- Write a short purpose statement (e.g., “Holiday gift for marketing team”).
- Identify whether text or image is the primary focus.
- Determine tone (professional, playful, minimal).
- Decide on one clear focal message.
- Keep the concept simple and visually direct.
What to watch for
- Overcrowding the layout.
- Mixing multiple themes.
- Long paragraphs of text.
- Unclear visual hierarchy.
Tool notes
For organizing concepts and message drafts before designing, Notion (workspace and documentation platform) can help outline copy and refine phrasing before it goes into the design tool.
Step 3: Add and Format Text for Readability
Goal
Make sure the message is clear at typical viewing distance.
How to do it
- Insert text boxes and choose a legible font.
- Adjust font size for readability.
- Increase line spacing slightly.
- Center-align for symmetrical layouts.
- Limit the design to one or two font styles.
What to watch for
- Decorative fonts that reduce clarity.
- Text too close to edges.
- Overly long sentences.
- Uneven alignment.
Tool notes
To check grammar and readability before finalizing text, Grammarly (writing assistance tool) can help refine phrasing and eliminate small errors that would otherwise appear in print.
Step 4: Insert High-Resolution Images or Graphics
Goal
Ensure images print sharply and proportionally.
How to do it
- Upload images at 300 DPI when possible.
- Use PNG files for logos with transparent backgrounds.
- Scale images proportionally.
- Preview at full zoom.
- Test contrast against mug color.
What to watch for
- Low-resolution images pulled from social media.
- Stretching images beyond original size.
- Clashing colors.
- Accidental pixelation.
Tool notes
If you need to resize or lightly adjust image resolution before upload, tools like TinyPNG (image optimization service) can compress files without visibly degrading quality.
Step 5: Adjust Layout for Mug Wrap and Viewing Angle
Goal
Confirm the design works once wrapped around a curved surface.
How to do it
- Use preview mode to simulate curvature.
- Check placement relative to handle.
- Decide whether design favors right-handed or centered orientation.
- Ensure key elements stay within safe area.
- Test balance across left and right edges.
What to watch for
- Text wrapping too far around the mug.
- Important elements hidden by handle.
- Uneven spacing.
- Misaligned symmetry.
Tool notes
To visualize 3D presentation for sales or client review, Placeit (product mockup platform) can generate mug mockups without modifying the design file itself.
Step 6: Choose Mug Color and Finalize Background
Goal
Ensure design contrast and visual clarity.
How to do it
- Select mug color before final export.
- Adjust text color for strong contrast.
- Avoid subtle gradients that may print unevenly.
- Test light-on-dark and dark-on-light variations.
- Keep background simple unless intentional.
What to watch for
- Low-contrast color combinations.
- Designs that disappear on dark ceramic.
- Unintentional bleed edges.
- Color mismatch expectations.
Tool notes
To validate color codes and contrast ratios, Coolors (color palette generator) can help confirm complementary or high-contrast combinations before export.
Step 7: Export a Print-Ready File
Goal
Produce a high-resolution file suitable for printing.
How to do it
- Review spelling and alignment.
- Confirm bleed coverage.
- Export in high-resolution PNG or PDF.
- Double-check file dimensions.
- Save version with clear naming.
What to watch for
- Low-resolution export settings.
- Cropped edges.
- Incorrect file format.
- Missing bleed.
Tool notes
To confirm file specifications align with printer requirements, refer to the documentation from a fulfillment service like ShipStation (shipping management platform) if coordinating batch distribution logistics.
Step 8: Organize Files and Manage Orders
Goal
Maintain order accuracy and version control.
How to do it
- Store design versions clearly labeled.
- Keep original editable file.
- Track quantities ordered.
- Record print provider details.
- Log delivery timelines.
What to watch for
- Mixing file revisions.
- Sending outdated artwork.
- Missing deadlines.
- Confusing bulk quantities.
Tool notes
Project management software such as Asana (project management platform) can help track production deadlines and order stages, especially for team-based or commercial mug production.
Common Workflow Variations
Photo-Based Gift Mug
Use a high-resolution photo with minimal text overlay.
Quote-Focused Minimal Mug
Design centered typography with high contrast.
Pattern-Based Wraparound Design
Use repeating graphics and test edge alignment carefully.
Small-Batch Merchandise Test
Print one sample before committing to bulk production.
Checklists
Before You Start Checklist
- ☐ Confirm mug size and template
- ☐ Gather high-resolution images
- ☐ Draft primary message
- ☐ Check printer file requirements
- ☐ Choose mug color
- ☐ Identify bleed area
- ☐ Confirm usage rights for logos/images
- ☐ Set production timeline
Pre-Export / Pre-Order Checklist
- ☐ Spelling reviewed
- ☐ Text inside safe area
- ☐ 300 DPI export selected
- ☐ Correct file format chosen
- ☐ Curved preview checked
- ☐ Colors validated
- ☐ Version labeled
- ☐ File backed up
Common Issues and Fixes
Low-Resolution Image
Replace with higher-resolution source before scaling.
Text Too Close to Edge
Move inside safe margin guidelines.
Color Shift in Print
Check printer color profile and increase contrast.
Cropping at Handle
Reposition focal elements toward center.
Distorted Wrap Appearance
Use preview tools before exporting final file.
How To Use Mug Printing Tools: FAQs
Do I need design software experience?
No. Mug printing tools are template-driven and beginner-friendly.
Is starting from a template better than blank canvas?
Templates reduce sizing and margin errors.
Can I export and use any printer?
Yes, as long as you match the printer’s file specifications.
How important is bleed?
Very important for full-wrap designs to avoid white edges.
Are phone photos acceptable?
Yes, if they are high resolution and not heavily compressed.